Showing posts with label windows 7. Show all posts

Tuesday, August 5, 2014

OpenJUMP for Editing Geometry and Attribute Data

OpenJUMP is a neat little program for editing geometry and attribute data in GIS-related files.  It is free and open source, its project source code can be downloaded.  A full list of its features can be found here. Anyone that has gotten deep into a GIS project knows that inevitably attribute or geometry data will need be edited.  


OpenJUMP can be installed on Windows, Mac OSX, or Linux.  Instructions for installation are found on the project's wiki:  http://ojwiki.soldin.de/index.php?title=Installation#Requirements.

After installing and opening the program, you will find a neat and organized interface.  Setting up workspaces/a project space is easy and smooth, unlike other programs that I have used.  There is a very nice and functional menu bar at the top.  Buttons below provide for basic functions that are common in GIS-related programs.

You will find a lot of functionality in the "Tools", "Rasters"," and Plugins on the top navigation bar.  For example, in Tools you will be able to:
  • Do spatial and attribute queries
  • Proximity/buffer analysis
  • Create statistics about the layer and featurs
  • Generate grids,etc.
  • Perform quality assurance (QA)
  • Edit geometry data
  • Edit attribute data
Also, right-clicking on a loaded layer, will also bring up a wide variety of actions to be performed.

First, our map.  Below is a map of shapefiles loaded in OpenJUMP for Cornell University's campus buildings and a shapefile of trees from an inventory in 2012. Click any of the images below to see them in a larger version.


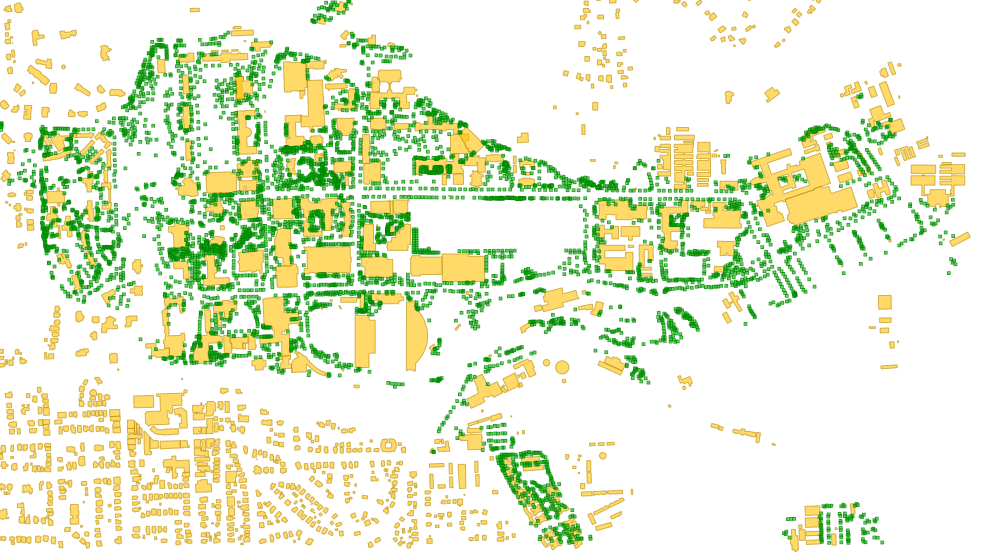
Cornell University Campus and Tree Inventory.
Editing Attribute Data

Below is a screenshot of the attribute table in OpenJUMP.  Right-click in the table, and selecting "Editable" allows users to edit attribute data and also brings up an additional Editing Toolbar for editing geometry.

An attribute table for our tree inventory file.
Editing Geometry Data

At right: the Editing Geometry toolbar.
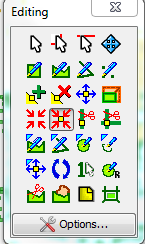
Editing geometry toolbar includes the ability to:

  •  Select features, parts, and linestrings
  • Draw rectangle, polygon, linestring, and points
  • Invert, delete, or move a vertex
  • Scale selected items 
  • Snap vertices, snap vertices to selected vertex, split lines, node lines
  • ...and about 12 other actions

So, let's say I wanted to edit a building.  I would right-click on the shapefile and click "Editable" and then make the change, say using the delete vertex tool.  Your cursor becomes a small red x and pulsates/sends a ping to let you know that the action has been completed.

Lastly, a quick word about using the Feature Info Tool / identify tool.  With it, you have several different ways to display information about select features.  The screens below show information for a tree shapefile.

The Feature Info Tool allows you to view attribute and/or geometry data
with a few clicks of a button, it can be viewed in different formats.
OpenJUMP has a lot of interesting features, including exporting images as scaleable vector graphs or *.svg. Be sure to check out OpenJUMP at: http://www.openjump.org/.

Friday, March 21, 2014

Creating QGIS Plugins in Windows: Getting Started

I have started thinking about creating a plugin or two for QGIS, but I ran into a few hurdles along the way... I am not a programmer (and maybe you are not either!), but I know a few basic skills, so keep that in mind. I am working on creating QGIS plugins on a Windows 7 PC.  Many programmers likely use a Linux distribution.

First, there are several tutorials on the web but I would start with this one.  To start, in QGIS navigate to the "Plugins" tab and download the Plugin Builder, if you don't have it installed already. The plugin builder creates a template with important information for your plugin as well as the needed files.  Click on any of the screenshots to magnify them.

QGIS Plugin Builder 2.0.3
The text in green and the link to the tutorial explain what each of the fields mean and does for your plugin. A folder with the necessary files will be created.  Remember the file path.

The next step is to compile the plugin files.  This was the first hurdle.  Eventually, I found a post with a solution.  Double-click the OSGeo4W icon on your desktop.

  1. At the command prompt, point to the folder where your plugin is located.  Example:  cd: C:/Users/yourusername/.qgis2/python/plugins/pluginname (in this example CalculateArea is the name of the plugin).  You will need to substitute the fields highlighted in red.
Point to the directory where you plugin is located.
  1. Next, type: pyuic4 -o ui_pluginname.py ui_pluginname.ui and press Enter
  2. Lastly, pyrcc4 -o resources.py resources.qrc and press Enter
Compiling the Resource and UI files

Then follow the steps for deploying and testing.  After installing the plugin from the plugin tab, you should be able to see it in the tab along with any other plugins you have installed.  Click it and the basic plugin window will appear!  You should be able to install your plugin in QGIS and see its name.
The basic plugin window with the name of your plugin
Lastly, time to start writing some python. You can download a viewer/editor like gedit.  Open up the file named pluginname.py and you will see a lot of the basic skeleton coding already written.

Viewing and editing python code from the QGIS Plugin Builder 
A few parting thoughts:  Be sure to search the QGIS repositories to see if someone has already created a plugin for what you are thinking of doing.  Borrow code from other plugins, which have been validated, to help speed the process along.