Tuesday, December 8, 2015

QGIS and FOSS GIS Wishlist for 2016

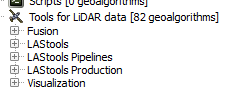
Happy holidays! I am certainly thankful for QGIS this year as it showed significant improvements to its capabilities and the user experience.  Many other free and open source GIS projects also improved including a major update of GRASS GIS and gvSIG graduating from incubation. In addition, SaTScan continues to get easier to use while providing advanced spatio-temporal statistics. GeoDA has reached nearly 150,000 downloads, and LAStools continues to rock!

Thanks to QGIS and  ALL FOSS GIS Developers!
I wanted to take a moment to talk about my QGIS wishlist for 2016.  In the coming year, I hope to get more involved...I am aiming for trying to create some plugins. You can checkout the QGIS roadmap and submit requests for new features at: http://hub.qgis.org/projects/quantum-gis/roadmap.

What are your wishes for QGIS in 2016?  Feel free to leave them in comment section below!

Of course, the core QGIS developers are always hard at work, and some of these may not be scheduled for the near or future release, but it is always good to dream! These are on the advanced feature end, and although not critical, would be nice to have.

My QGIS wishlist for 2016:
  • Continued commitment to cartography (definitely happening)
  • Full-funding goals reached for crowdsourced QGIS plugins and projects.
  • More maps in the QGIS Flickr Showcase (Do your part!)
  • Continued improvements to the Print Composer
  • Error-free or near-error free releases of QGIS. 
    • I worry as more features are added, more bugs could creep in!
  • Ability to join points to lines - visualizing data by street segments can be extremely cool!
  • More spatial analysis tools integrated directly into QGIS core
    • Might include linear directional mean, standard distance, or others...
  • Ability to create an address locator from reference data
    • Online locators have limitations (number of records that can be (batch) geocoded) and can't be used for confidential data
Some other/non-QGIS wishes
How to contribute
Lastly, there are many ways to contribute to QGIS: http://qgis.org/en/site/getinvolved/index.html. Also, if you use QGIS, whether for school, business, government, or non-profit, please consider a donation!  https://www.qgis.org/en/site/getinvolved/donations.html

Monday, November 2, 2015

QGIS 2.12 Release: Focus on Customization

QGIS 2.12 Lyon has been released and focuses on customization based on user preferences and improvements for more efficient workflows.  For a quick overview of changes head over to the Visual Change Log:http://www.qgis.org/en/site/forusers/visualchangelog212/index.html

Project Management
After installing 2.12 and creating or re-saving at least one project, restart QGIS and you will be greeted by a "Recent Projects" window within QGIS that has a thumbnail of your project, title, and a few details, like coordinate system and projection.  Double-click on an entry and you will be taken to your project.

Recent Projects display nicely and neatly within QGIS.

User Interface
You can now change the color scheme of QGIS to suit your liking, daytime, or nighttime mapping lifestyle.  I am sure that the QGIS Community will come up with some neat themes--and at least one in QGIS green!  Note: As of writing, there has been a bug that will be quickly fixed.  How to make changes are described by the feature's creator here: http://nathanw.net/2015/08/29/ui-theme-support-now-core-in-qgis/.  The default UI can be rather bright being both gray and white.  Having some contrast can definitely help users in certain settings.

You can now change the UI theme to suit your liking.
Image source: http://nathanw.net/2015/08/29/ui-theme-support-now-core-in-qgis/

Conditional Formatting in the Attribute Table
Cells in attribute tables can now be color coded based on rules.  This can help to identify certain groups of data as well help to highlight errors or outliers. It is easy to overlook the new button for this feature. After opening the attribute table, look in the upper right-hand corner for a small button with color bars stacked. Click the image below to get a closer look at its placement.
In the table above, records for Alabama ("STATE"='AL') are highlighted in Red,
while Arizona's records below are not highlighted.
The color formats are saved, so when you re-open your QGIS project and the attribute table they will still be there.  It is a good way to keep notes or tag certain records for later.

Labels
There are numerous improvements to labeling including:
  • Only drawing labels that fit inside polygons
  • Label priority and obstacles
  • Rule-based labeling
Print composer
QGIS Atlas in Print Composer is getting closer and closer to ArcGIS's Data Driven Pages that is used to create map books.  Navigation is now easier as buttons allow users to skip ahead to any page in the map book. More data defined controls have been added -- allowing for the creation of more complex map books that loop over different layers.  If you want to learn more about the Atlas feature in QGIS, check out my YouTube video here: https://www.youtube.com/watch?v=gCISvTfHtZc

Symbology
Existing color ramps can now be edited, so you do not have to start from scratch.  This is a definite time-saver and an overdue feature.

All color ramps, including existing ones, can now be edited.

Other Notable New Features
There are improvements to digitizing in QGIS as well as raster alignment tools, and much more!

Thursday, October 22, 2015

Book Review: An Introduction to R for Spatial Analysis and Mapping

I decided to talk a walk on the wild-side and examined R as a GIS for spatial analysis.  I hope to use several of R's spatial statistics packages and to automate tasks--staying within one program.  I highly recommend Brunsdon and Comber's book ($50 on Amazon, Paperback, electronic versions also available).

About the Authors: Chris Brunsdon is the creator of geographically weighted regression or GWR. Lex Comber is a professor at Leeds University.

Four Reasons to choose R as a GIS
1)  You are interested in performing tailored exploratory spatial data analysis (ESDA), spatial statistics, regression analysis, and diagnostics.
  • Of course, R is also way better than ArcGIS and QGIS for summary statistics too. (Notably, QGIS has integrated a R processing toolbox into it. ArcGIS  also has an official bridge to R.)
2)  You already use R for non-spatial data, have lots of code written, and need to analyze spatial data.

3)  You do not want to export your data (or results) from one program into another and back again!

4) You want to be able to publish or share your code with a wider audience.

A great cover to a great book!
Reader Accessibility
The content is extremely well-presented, clear and concise, and includes color graphics. It is not overly technical. Still, R as a GIS and spatial analysis are tough material and is definitely not for the faint-of-heart. The authors assume readers may not have either a R or GIS background, or both. I took a R class in graduate school and occasionally use it.

Additional packages that assist in manipulating and reshaping data, such as plyr, are also discussed. The authors also warn readers that R packages can change over time, causing error messages, but many warn users about recent and upcoming changes.

Overview
In the first 40 pages, you will learn R basics, if you don't already have a foundation. Next, you will learn GIS fundamentals, how to plot data to create a map, taking into account scale, and adding and positioning common map elements like a north arrow and scale bar. This may sound basic but in R nothing is easy!  Of course, the advantage with code is that you can reuse it or may only need to modify it slightly for many maps.

Late in Chapter 5-6 the book dives into spatial analysis.  The last few chapters are probably the best of the book, as more advanced statistical techniques are discussed including local indicators of spatial auto correlation (LISAs), geographically weighted summary statistics and regression.

The book providers a great guide and reference, and I am sure I will be re-visiting it frequently!  Overall, it is a great mix of practice and theory.

Disclosures: 
None, I found and purchased the book on my own.

Wednesday, October 14, 2015

Video: QGIS Print Composer - Side-by-Side Maps and Atlas

QGIS has a powerful print composer that allows users to create complex maps very quickly.  Two common practical examples include creating: 1) side-by-side (or multiple maps) on the same canvas/layout and 2) a map book or atlas. This week's video looks at these cases: https://www.youtube.com/watch?v=gCISvTfHtZc.


In the video, we will create side-by-side maps of different band combinations of remote sensing imagery of the Salton Sea.  For a related blog post, visit:
http://opensourcegisblog.blogspot.com/2015/08/tutorial-side-by-side-maps-in-qgis.html

We will also use the atlas to take a closer look a battleground states during the 2012 presidential election.

Lastly, I searched high and low, but I could not find any guidance or cartographic reference on creating side-by-side maps. So, I looked through several dozen examples, found a couple of themes, and drafted some suggestions --which you can find towards the introduction--and below.
A few suggestions for creating multiple maps on the same canvas/layout.
In the coming months, we will also re-visit the atlas function in print composer and look at more complex examples.

Sunday, October 4, 2015

Video: Tips for Using QGIS Print Composer

QGIS Print Composer can be a little awkward to use at first.  It is analogous to Layout View in ArcGIS.  We will look at some tips to make it easier to use and understand how to create maps in QGIS.


In the video, we will review a map of 2012 Presidential Election Results, as seen below.


In Part II, I will show you how to create side-by-side map series, which is great to look at changes over time as well as different band combinations in remote sensing.  We will also take a look at creating an atlas or map book, essentially iterating/repeating the map making process by a geographic area.  Lastly, we will take a look at the QGIS Map Showcase on Flickr.

If there is something you would like to see, let me know in the comments section below.

Update #1: Print composer has an add Legend button but in this video I used an image file because I used some fancy rule-based symbology, the legend was not easy to look at. Normally, I would just select add Legend.

Wednesday, September 23, 2015

Video: Free and Open Source GIS Reference Data

After last week's post looking at the landscape of free and open source GIS software, the next logical step is looking at open GIS data. This video looks at reference data. I am still deciding on what to do the next video on...the choices are a) Open data portals, b) novel data types, social media (TwitteR and Instagram), or c) remote sensing.  Let me know what you would like to see in the comments below.


Topics covered in the video include:
Census: https://www.census.gov/geo/maps-data/data/tiger.html
DataFerrett: http://dataferrett.census.gov/
Summary File 1 DVD: https://www.census.gov/mp/www/cat/decennial_census_2010/summary_file_1_1.html
Natural Earth: http://www.naturalearthdata.com/
OpenStreetMap: https://www.openstreetmap.org/
GeoNames: http://www.geonames.org/
US Board on Geographic Names:http://geonames.usgs.gov/domestic/index.html
Maryland Department of Planning/ACS: http://www.mdp.state.md.us/msdc/S7_ACS.shtml

Tuesday, September 15, 2015

Video: A Quick Introduction to Free and Open Source GIS

My first video has been posted to YouTube.  It briefly covers the landscape of free and open source GIS (FOSS GIS), remote sensing and processing, a few related tools, and JavaScript libraries for creating online interactive webmaps.  It does not cover every program out there but gives new and returning users a place to see all of the options available.  You can check it out here: https://www.youtube.com/watch?v=rB_qnTE-W9c or subscribe to the channel by clicking here.

I hope to bring out more videos in the near future including delving into each of the programs and step-by-step tutorials.  So stay tuned!  As always feel free to leave comments, questions, or feedback below.  Be sure to like the video and subscribe if you would like to see more.

Thursday, September 3, 2015

Tips for Using LIDAR and LAStools in QGIS

LIDAR is an important technology that is undergoing continuous and expansive growth and predicted to reach $1 billion by 2020.  A recent report also describes ongoing developments in LIDAR in Europe. NOAA has a great one-hour Introduction to LIDAR that I recommend checking out: http://coast.noaa.gov/digitalcoast/training/intro-lidar

Source: Allied Market Research, https://www.alliedmarketresearch.com/lidar-market
LAStools is the popular LIDAR processing tool created by the developer of *.las and compressed *.laz formats.  There is a standalone program as well as toolboxes for a variety of programs including QGIS. We will cover a few tips and wrap up with a look at Wizard Island, Crater Lake, Oregon.

Linking LAStools with QGIS
Linking the two has gotten much simpler since QGIS 2.4.  Simply download the *.zip file from: http://lastools.org/download/lastools.zip.  Unzip the file, and copy and past the LAStools folder into a simple directory like "c:/" If you have QGIS running, close it before proceeding.

Tip #1: Users often copy the folder to a folder pathway that is complex and includes spaces like c:/Program Files/ or c:/My Documents. It will not work. Again, use simple path names, no spaces!

Tip #2: This also applies for any files you import with LAStools or export during processing in QGIS.

After doing this, start QGIS, go to the Processing Toolbar, click "Tools for LiDAR Data"->Activate-> and enter or browse to the folder pathway. I've been using LAStools with the most recent version of QGIS (2.10) and have not had any problems yet.

Linking LAStools and QGIS has gotten much easier!
Click "Ok", then head over to the Processing Toolbox side-panel, and you will see the tools ready-to-use!

Expand and see a wide range of tools at your disposal!
Note: The LAStools Production or PRO tools are for batch processing.

Tip #3: If you run a tool and nothing happens, be sure that NONE of the folder pathways, for importing data and exporting results, are complex and/or contain spaces.

Tip #4: Be sure to read the "Log" for important information and troubleshooting.


Tip #5:  When using lasview in QGIS, pressing Space bar changes your ability to navigate from zoom, tilt,pan, and translate.  In the upper-left of the window, you will see the navigation type change as you press it.

Furthermore, right-clicking the mouse, brings up a menu for changing the view of LIDAR, from selecting returns, how to symbolize/color data.

The right click menu in LAStools

Tip #6: To get a 3D view, press Space bar until Pan is displayed, if is not already.  Click and hold your mouse, then move it up to the top of the screen and voila!


Wizard Island, Crater Lake, Oregon, Data from: Open Topography. lasnoise was also used.
See also:
OpenTopography
Digital Coast
3D Elevation Program
Google search for "County lidar" and State LIDAR

Monday, August 24, 2015

Making Maps with 'Google My Maps', Part II

Now we will look at more features, performance, and wrap up with some strengths and limitations of My Maps.  If you missed the first post, you can check it out here!

Symbology/Icons
Google includes a set of stock symbols that can be added to your map. Clicking on a category in a layer will bring up the option to change the marker color as well as add different icons.  Google has a nice stock selection of icons for: business, crisis, facilities and services, points of interest, recreation, and transportation.
Google has a nice set of stock icons.
You can also add custom icons at the bottom of this pop-up by linking to an image's web address.

Polygons in KML
Adding polygons will slow down your maps performance, currently, when they are clicked the polygon also shows the points that make it up--a strange sight--compared to other web publishing platforms.

Labeling
You can add labels by clicking the style paint brush, but your map will also take a performance hit. However, even with lots of labels, performance remains very respectable.
Adding labels will decrease the performance of your map.

Set Default View/Extent
Click the three vertical dots on the "Add Layer" menu (not the individual layer), and you will see the option to set and confirm and default view/extent, you can zoom in/out and pan and click this to set it.
Setting a good default view can significantly increase your map's appeal.

Limitations
Google has a nice table of file limits at: https://support.google.com/mymaps/answer/3370982?hl=en. Maps are limited to 10 layers, 10,000 features per map (2,000 per layer), maximum of 50 attribute columns, 5 MB for KML/KMZ, and 2,000 rows/points and up to 40 MB for other file types.
Google's clearly lists the limits for data uploads.
Interestingly, maps can be printed in HD up to 4K resolution. The ultra-high definition revolution is upon us!

Conclusion
Google has developed a nice user friendly interface to allow anyone (even non-mappers) to create free interactive maps. Very cool!!  It will be interesting to see how much My Maps is developed/improved, how quickly/slowly, or whether it stays the same.

Monday, August 17, 2015

Making Maps with 'Google My Maps', Part I

Google may be moving away from making software, like Google Earth desktop--the Pro version was made free--but they still have a few tricks up their sleeve.  Recently, Google made a solid entry into the web publishing domain by giving users the tools to create more sophisticated online maps.  Gone are the days of just adding placemarkers, and now users can add spreadsheets (automatically geocoded) and *.kml files.

As of mid-summer, users can now create and manage their own maps via Google Drive, called "Google My Maps" or simply "My Maps."  All you need to do is setup a free Google Drive account, click on "My Drive" at the top, then "New File", and "Google My Maps"

Google created a very user friendly way for users to make online maps from Google Drive.
There are nine different basemaps to choose from.  Adding layers is easy.  Simply, click the link "Import" to add data or "Add Layer" to add additional layers on top or below.  You can add *.csv, *.xlsx, or *.kml files.  You can directly import files by searching your Drive or import them from your desktop.  If you use a spreadsheet, Google will prompt you to identify the location field or field(s) whether an address or placename as well as how to identify/name your features.


In this example, we will look at a spreadsheet of Substance Abuse Clinics (2011) from the City of Chicago of Data Portal.  After clicking "Import, we are asked to select the location field(s). It can handle addresses in a single or multiple fields.  Next, you will be asked what name/title for your places should be.

If Google has problems geocoding a spreadsheet, you will receive a warning.

Next, we will symbolize the markers by "Population Served" or age groups that each clinic serves. You can also change the symbols for each class.

Google allows map creators to make changes to symbology.
At this point, you will probably start to think about saving your project...But, Google has you covered as changes are saved as you go along.  Be sure to give your map a good name, so it does not get lost among your other files.

You can even add a widget for people to get directions.
 Maps can be shared and permissions set with a few clicks after pressing the share button.
What the map looks like so far.  Clicking on markers brings up attribute data.

You can check out the interactive version at: https://goo.gl/39D8lG using your desktop computer or mobile device. Next post, we will look at more features, performance, and wrap up with some strengths and limitations of My Maps. 

Saturday, August 1, 2015

Tutorial: Side-by-Side Maps in QGIS Print Composer

Step #1: Open New Print Composer
QGIS print composer can be a bit daunting and confusing. It is equivalent to the Layout View in ArcGIS, where users can setup their map for printing and publication. One common task is to create side-by-side maps, to compare imagery, choropleth, or other types of maps.  I looked but could not find a good tutorial with screenshots, so here we go!


Purpose
To create three side-by-side maps of different band combinations from Landsat 7 imagery of the Salton Sea. The maps will be exactly the same size.  The different band combinations were created using the Orfeo Toolbox->Image Manipulation->Images Concatenation and selecting various band combinations.

Step #1:  For starters...
I've started by just selecting the natural color view (bands 3-2-1).  Go to the the Project Toolbar in the upper left-> New Print Composer. 

  • You can also can the page layout to landscape or portrait, depending on whether your map series will be laid out horizontally or vertically.

Step #2:  Creating the first map

Click the "Add New Map" button, highlighted in red. and draw an area for your map on the blank page.  For best fit of your image, be sure in QGIS to have zoomed into an area of interest. 


  • Then on the right hand side of print composer, select "Item Properties" and click the long button for "Set to Map Canvas."
After Steps #1-2

Step #3: Add the second map

Before adding the second map to the right, scroll up in "Item properties" and check the box for "Lock layers for map item."  The click on the existing map in print composer and copy and paste it. On this second map, be sure to uncheck the box we just checked: Uncheck "Lock layers for map item."


  • In QGIS, add the next layer, in this case I added a false color image from bands 4-3-2.
  • Go back into Print Composer and hit the blue refresh button.
  • The second map should display the false color image and the first map should remain natural color.
After Step #3

Step #4: Repeat for the third map
Before copying and pasting, make sure to check the "Lock layers for map item" box.  Copy, paste, and then uncheck this for the third map, with the last set of band combinations (7-4-2).  The final map appears below.
Click to enlarge the map.
Three side-by-side maps, equal sized, and the same scale.
For more information:
You can find additional tips about using the map composer from multiple frames and different layers in this discussion on StackExchange: http://gis.stackexchange.com/questions/45174/how-to-handle-multiple-map-frames-with-different-layers-in-one-print-layout

Wednesday, July 8, 2015

What to Expect in QGIS 2.10 Pisa

With the next release of QGIS on the horizon, I downloaded the latest nightly build and looked through the visual change log to see what to expect.  What I found is very exciting!

If you have not looked at QGIS Visual Change Log, it is a quick way to see changes from release-to-release.  It includes screenshots and quick explanations of the upcoming changes.  It also lists the contributor(s) and funding source.

Rasters
The new release includes log functions (natural and base 10) for the raster calculator.  This is great since many remote sensing calculations use logs, for example land surface temperature via Landsat 8. Zonal Statistics for rasters is now included as a core plugin of QGIS.  This allows users to summarize the characteristics of raster layers using a polygon layer for setting zones.

Symbology and Histograms
When you go to symbolize a layer using a graduated scheme, you can now adjust the breaks by using an interactive histogram, akin to what you will find in ArcGIS.  If you change your classification scheme, be sure to (re)load or reclassify the layer before clicking on the histogram tab.  Below is quick example using population by county for Maryland.

Histogram view of two classification schemes:
Top: Equal interval, Bottom: Quantile / Equal Count
Live layer effects
Live layer effects is probably the most talked about new feature and was crowd-sourced.  It adds the ability for a variety of effects including a drop shadow.  The creator of this feature has a great post and quick how-to. Basically, when you got to style a layer, look towards the bottom, check the "Draw Effects" check-box.  Then, look a fair way to your right and click the 'yellow star.'

I found using this to be much easier-to-use than its implementation in ArcGIS.

It can be easy to overlook the Draw Effects check box when styling.
Adding effects is easy-to-do in QGIS and look good!
Often, I feel my maps can get stale, or someone wants a more 'graphic' or photo-shopped look for a presentation, other product, or to develop a 'brand.' So having this feature is great, especially, if like me, you are not an expert graphic designer or cartographer. I look forward to seeing creative uses of this feature in the QGIS Flickr Map Showcase.  There may already be a few in there!

Follow point labeling
Good, clear, and legible labeling help separate the good mappers from the bad.  Follow point labeling has been added to align text based on where the label is located.  So, if a label appears to the left of a point, the text will be right-aligned.  This will also help with multi-line labels.

True Curves
There is a new geometry engine which allows for 'true curves' to be represented as such -- instead of segmented lines or polygons.  If I am not mistaken, I believe this is very important for a variety of users, but particularly for CAD users or those that use CAD and GIS.

New desktop icon
To start QGIS, the old familiar neon yellow/green "Q" is gone in favor of a more professional looking two-tone green globe for an icon.  I am glad that the distinctive QGIS green remains,  For those using both ArcGIS and QGIS installed on the same computer, it will still be easy to distinguish between the program icons.

Monday, June 29, 2015

Book Review: PostGIS Essentials

I decided to teach myself PostGIS/PostgreSQL.  The other option was returning to GeoServer, which I started last summer, but I will leave the latter for the fall.

After shopping around and reading reader reviews, I purchased PostGIS Essentials, April 2015 by Angel Marquez. I got a Kindle copy which was $22 on Amazon.  Overall, I recommend it for those, like me, who want to learn PostGIS as a beginner. Having even a little SQL knowledge is also very helpful.  However, the later chapters are for much more advanced users and developing web and desktop applications.

The book covers downloading and installing PostGIS and gives a good quick background on its uses. Next, it illustrates three ways to create a spatial database using: 1) the command prompt, 2) the toolbars or GUI in PostGIS, and 3) a SQL script.  

A great way to learn PostGIS/PostgreSQL
Before covering how to insert data into these tables, the book goes into discussion of projections and how to include these in spatial tables.  It then shows how to manually add this information and also extract it from shapefiles and import it into PostGIS.

Next, we get down to business with creating non-spatial and spatial queries/functions and accessing information from more than one database.  Of course, connecting to PostGIS databases in QGIS is also covered as well as doing spatial queries in QGIS using PostGIS using DB Manager toolbar in QGIS.

Going from PostGIS to QGIS is a snap!
Using DB Manager from the database toolbar in QGIS.

You will also find information on GDAL, working with raster files.  The last few chapters cover advanced features including performance tuning and spatial indexes, developing web and desktop GIS applications.  The latter uses NASA World Wind.  (Note: I have only had time to skim these chapters.)

A few quick pointers

  • Early on the book assumes the reader knows where to execute SQL queries..If you are a novice like me it takes a minute to realize it is the magnifying glass 
  • ...and how to switch to a different database table when running code on several different ones. 

  • Be sure to check the column names in data from OpenStreetMap, particularly the id column: osm_id vs. id.
Overall, the book is a great resource to have. Like all of Packt's books the code is available to download on their website, or you can type it in yourself, which is my preference.

Disclosures
I bought the copy of this book on my own.  I served as a reviewer for another Packt publication.

Tuesday, June 16, 2015

QGIS vs. ArcGIS: Adding Magnetic Declination

This is a QGIS vs. ArcGIS throwdown.  It has been a while since I did the last one on kernel density and Thiessen polygons.  Recently, I was looking over new QGIS plugins and one in particular caught my eye: the QGIS Magnetic Declination Plugin. Magnetic declination is simply the difference between geographic and magnetic north, caused by the earth's magnetic fields. This difference also changes over time. ESRI has a nice technical article on their blog.

NOAA Historical Magnetic Declination Viewer:
http://maps.ngdc.noaa.gov/viewers/historical_declination/
ArcGIS
Adding a declination diagram in ArcGIS can be a bit tricky. As of version 10.2, there is a template and several tools to assist.  You will need a Standard or Advanced license plus the Production Mapping Extension.

QGIS Plugin
On main toolbar in QGIS, go to Plugins-->Manage and Install Plugins--> and search for Magnetic Declination. After a quick installation, you will see a green and yellow star appear on your toolbar. Click it and you will see the toolbar open below.

You can select a location off a map, such as OpenStreetMap, calculate it and map it!  Best of all, the resulting compass rose and measurements also appear in QGIS Print Composer.  Under the options tab, you can also change the color. I found it helpful to change it to black.

Steps:
  1. Click LON/LAT from map
  2. Choose any options
  3. Press "Calculate" button
  4. Then "Draw Compass Rose"
Screenshot of the plugin, steps, and buttons.

  • Click any of the screenshots below to get a closer look.
Up close example with  declination, true, and magnetic north shown in Greenland
where declination is much greater.
Showing positive, zero, and negative declination in the US.

The plugin is very new but is being updated, so stay tuned!

Update #1
I forgot to mention that you can customize the size/diameter of the compass rose--as large or as small as you need depending on whether you are interested adding it to a small scale map or a large scale map.

Wednesday, June 3, 2015

Mapping Photos with the Leaflet.Instagram Plugin

About a month ago, I posted about accessing Twitter data via R.  Now, I will cover accessing and mapping photos from Instagram using the Leaflet.Instagram plugin which can be found on github: https://github.com/turban/Leaflet.Instagram and Instagram API.

If you want to skip ahead and see the resulting map, then visit: http://webmapexamples.net/instabaltimore.html

Note: The difficulty of this project is moderate to difficult based on the large number of Leaflet plugins and other code that you will have to use.  However, the results are terrific.  There are several different implementations of the code so you have a few options to pick and choose from.

Getting an account...
First, head over to the Instagram page for developers: https://instagram.com/developer/

Leaflet.Instagram Plugin
In addition to the Instagram plugin for Leaflet, you will need to install several other scripts including:
  1. Leaflet 
  2. reqwest
  3. Leaflet.markercluster
  4. jQuery
  5. fancyBox
You will need to ensure that the files are placed in correct directories and referenced correctly in your code.  If you a receiving errors, check to make sure everything is correct!   There are also several CSS files for styling.  Of course, you can find examples of webpages on github to make sure that everything works before trying your own example.

Getting an Access Token
In order to access Instagram, you will need an Access Token.  You will see this in the plugin code. This is different from your user id, etc. found on the Instagram API page.  Several websites will help you generate a token as well.

The Code
Making sure all of the JavaScript libraries are referenced properly is the toughest part.  Otherwise, the code comes down to just three pieces in Leaflet:

  1. Creating a variable for map for the <div> element
  2. Adding a basemap via L.tileLayer
  3. Making a call to the Instagram API which depends on what you want
    1. It can be based on tag, user, location,etc.
The Instagram API is well organized and easy to understand how to retrieve data.
In this case, I retrieved recent results from my Instagram photos.  Other criteria to select photos include: relationships, media, comments, liked, tagged, by location, and geography.

The Results
I created a quick map of photos from walking around Baltimore's Inner Harbor.  Unfortunately, it was cloudy, so I won't be winning any awards for great photos!  Head over to http://webmapexamples.net/instabaltimore.html to see the results! Clicking on the popups will show a larger picture, which is also clickable to take you to the original version on Instagram.

Walla! An interactive map of Instagram photos!
The map updates in real time, so as soon a photo is posted and the webpage refreshed, it appears.  If you want to see another example, head on over to the plugin creator's nice map where you can also see the clustering effect (photos grouped and numbered together) at: http://turban.github.io/Leaflet.Instagram/examples/fancybox.html or see below for the map of photos from Sjernaroy, Norway.

Wednesday, May 20, 2015

Arches 3.0 Released for Heritage Inventory

Developed jointly by the Getty Conservation Institute (GCI) and World Monuments Fund (WMF), Arches 3.0 (http://archesproject.org/) is an open-source based heritage inventory and management system.  I wrote a short blog about Arches back in 2013, and lot has happened since then!
"Prior to Arches, no modern software system was freely available to the heritage field, often leading organizations to expend scarce resources to create custom systems from scratch." - Arches Project 
Example of webmap powered by Arches: http://historicplacesla.org/map
For a live example of website and map powered by Arches head over to Historic Places LA: http://historicplacesla.org/index.htm or for the map: http://historicplacesla.org/map.

According to the project factsheet, Arches was designed with the following principles in mind:
  • Economical: As an open source system, Arches is available at no cost and allows adopters to share resources for software customization and maintenance.
  • Customizable: The software code is open, and the system is structured in modules to be easily extended. It is capable of presenting its user interface in any language or in multiple languages and configurable to any geographic location or region. 
  • Standards based: Arches incorporates internationally adopted standards for heritage inventory, semantic modeling, and information technology, leading to better practices in the creation and management of heritage data and facilitation of data exchange and longevity in spite of advances in technology.
  • Broadly accessible: Web-based for the widest possible access, Arches is user friendly, requires minimal training for most users, and is freely available for download from the Internet.
The Arches project website has a nice user-friendly layout and information is easy to find.
For documentation including how-to-install, visit: http://arches.readthedocs.org/en/latest/.  There is also a forum on Google Groups: https://groups.google.com/forum/#!forum/archesproject.